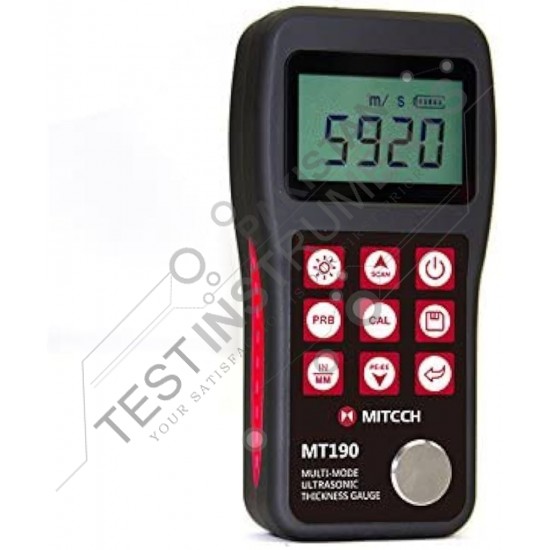
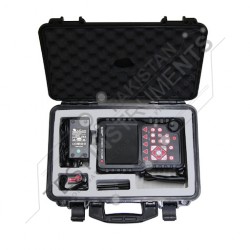
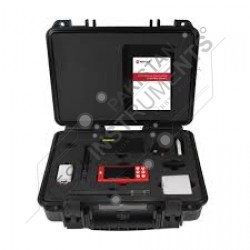
MT190 MITECH
- Stock: Pre-Order
- Model: Ultrasonic thickness gauge Throw Paint
Overview
MT190 multi-mode ultrasonic thickness gauge, based on ultrasonic measuring principle, it can perform thickness measurements on a wide range of materials including metals, plastic, ceramics glass and other ultrasonic well-conductive materials. It is also capable for measuring the sound velocity of the object with known thickness. Compared with the traditional measurement method, the advantage of ultrasonic thickness gauge is that it can finish the measurement only if it contacts with one side of the measured workpiece. Its unique performance of capable for testing thickness through the coating provides efficient
solution for testing the workpiece of coated surface or corrosion materials. It can test the workpiece directly without needing to get rid of the surface coating. It’s widely used for monitoring the production equipments’ various pipelines and pressure vessel corrosion reducing degree in the fields of petroleum, chemical, metallurgy, shipbuilding, aviation, aerospace and so on. It also can be used for making accurate measurement to various plates and machining parts. It is the necessary professional precision instrument for improving the production efficiency and qualification rate as well as saving cost.
Technical Parameters
Measuring Range | Support two modes for thickness measurement |
Accuracy | ±0.05mm(≤10mm);±(0.5%H+0.01)mm(>10mm); H refer to the thickness of workpiece |
Measurement Frequency | 7 times per second for single point measurement, 16 times per second for scan mode measurement. |
Display | High contrast Segment LCD display (support for EL backlight display) |
Resolution | 0.1mm/0.01mm selectable |
Sound Velocity Range | (1000~9999)m/s (Capable for measuring the sound velocity of the object with known thickness) |
Probe Calibration | Zero-point calibration, two-point calibration |
Thickness Measurement Mode | Single Point measurement, min/max measurement, differential measurement |
Data Storage | Capable for saving and managing 20 groups of thickness data (up to 100 values for each group) |
Units | Metric/Imperial unit selectable |
Communication | USB 1.1 interface for connecting with PC for printing |
Power Source | With two “AA” size alkaline batteries, it can work above 50 hours continuously with default brightness. |
Auto Power Saving | Auto shutdown power saving function |
Material | ABS engineering plastic |
Size | 150mm×74mm×32mm |
Weight | 245g |
Features
Capable of performing thickness measurements on a wide range of material including metals (such steel, cast iron, aluminum, copper and so on), plastic, ceramics, composites, epoxies, glass and other ultrasonic well-conductive materials.
With two thickness measurement modes: Pulse- Echo mode and Echo-Echo model, it can measure the thickness through the coating without calculating the coating thickness .
With large storage capacity and lower power design, it can standby super long time above months.
Capable for measuring the sound velocity of the object with known thickness, it can meet the thickness testing requirements for various materials.
Attach with USB data proceeding software, it can connect with PC for data’s analysis, storage and printing.
Capable for compatible with a variety of probes with different frequency and size, it can identify the probe type automatically.
With probe-zero calibration and two point calibration functions, it can correct the system error automatically
Equipped with narrow impulse composite crystal high accuracy probe, it has small dead zone and accurate measurement.
With EL backlight display, it is convenient for using in dim light environment.
With auto sleep, auto shutdown and other power saving functions as well as battery rest capacity indicating function. Smart portable design with high reliability, it can anti-vibration, shock and electromagnetic interference, suitable for harsh operating environment.
Working Principle
The digital ultrasonic thickness gauge determines the thickness of a part or structure by accurately measuring the time required for a short ultrasonic pulse generated by a transducer to travel through the thickness of the material, reflect from the back or inside surface, and be returned to the transducer. The measured two-way transit time is divided by two to account for the down-and-back travel path, and then multiplied by the velocity of sound in the material. The result is expressed in the well-known relationship.
Where:
H-Thickness of the test piece.
V-Sound Velocity in the material.
t-The measured round-trip transit time.
To make sure the probe working properly, it needs to use coolant to isolate the air between the probe surface and the measured work piece surface. The liquid used for the coupling between the probe and work piece is called as coolant.
Transducer Selection
Model | Freq | Diam | Measuring Range | Lower limit | Description | ||||||||||||||||||||||||||||||||||||||||||||||||||
N05 | 5MHz | 10mm | 1.0mm~600mm (in steel) | Φ20mm×3.0mm | Normal measurement | ||||||||||||||||||||||||||||||||||||||||||||||||||
N05/90° | 5MHz | 10mm | Overview Technical Parameters
Features Working Principle Where: To make sure the probe working properly, it needs to use coolant to isolate the air between the probe surface and the measured work piece surface. The liquid used for the coupling between the probe and work piece is called as coolant. Transducer Selection
ht:normal">1.0mm~600mm (in steel) |

